Search This Blog

Showing posts with label Painting. Show all posts

Monday, April 4, 2011

HUGE Reveal - Guest Bedroom and Bathroom

The fact that my mom is coming to visit has really lit a fire under my ass to get the guest bedroom and bathroom in a more user friendly state.  Jonathan and I have worked diligently to edge and roll every wall and all the trim in both rooms.  We spent multiple weekends cleaning the space, installing hardware, laundering the bedding, and painting some furniture.  I even got to spend a little bit of money on sprucing up the place with new accessories like a mirror and shower curtain for the bathroom.  All the effort has paid off.  The rooms are beautiful and sparkling!  I cannot believe how well they turned out. 


The guest bathroom used to have a large shabby chic mirror with country stars on it.  The walls were painted the same poopy brown as the rest of the house and there was no hardware in the room to speak of.  We repainted, recaulked, rehung a mirror, installed a curtain over the open front built-in shelving, bought a shower curtain, and purchased a matching floor mat.  The room needs some shelving over the toilet and maybe a small bench with storage under the towel hanger and light switches.


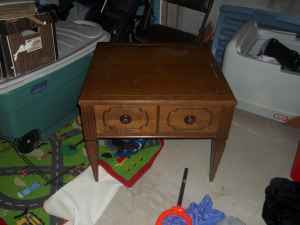


The bedroom looks equally fabulous, or perhaps even more so!  I spent a good deal of time transforming a plain wooden table into something vibrant and unique.


The yellow sheets my mom sent matched perfectly and painting the trim of the octagon window was the cheery on top.  The yellow is also highlighted in the curtain.  I was hoping to have a shower curtain made of the same fabric, but in the end it was too expensive and may have been a bit over kill.


I painted the wooden headboard from Jonathan's childhood a glossy white to update it a bit.  I didnt end up decoupaging the remaining curtain fabric onto it since I ran out of time and money, but it may be a project for the future.

Also, since our house only has two bedrooms, the guestroom also serves as an office.  We relocated our large white storage unit that we purchased two moves ago to function as a pantry into office storage in the bedroom.  We also hung the light bulb image we purchased at a local art show above the desk to inspire great ideas - cheesy but true.


In the end, I could not be happier with the results.  I would love to move a full sized bed into the guestroom so that couples could come a stay without having to share a twin - eek - or have to fight it out for the bed or the sofa.  I see a craigslist purchase in our future...

Tuesday, March 15, 2011

Hurt So Good?

Yesterday morning I woke up almost not able to move.  My forearms hurt, my lats hurt, and my back was killing me.  Evidently sanding those damned pieces of furniture was harder work than I had originally assumed and I was paying for it with muscle pain!

On Sunday I sanded the headboard for the guest room.  I didnt sand it enough to remove all the varnish, just enough to give the new paint something to stick to.  Still it created a fair amount of dust and took considerable time.  I then wiped it down with TSP and used an old paint brush to remove all the residual dust.  It got a nice coat of primer after that and is currently sitting in the garage waiting for a day that isnt rainy so it can get a coat of shiny white paint.

I am doctoring myself today with a fresh batch of homemade granola.  Its pretty good if I say so myself!  I made this batch with walnuts and figs but I have made others with apricots, blueberries, and almonds.  I started making granola when I noticed how much the cereal we were buying was.  In addition, my Mom had sent me about 4 metric tons of California walnuts and they were taking up valuable real estate in my freezer.  I happen to think my recipe is pretty good.  Its not too sweet and its not too clumpy - sometimes I have a problem chewing some of the granola with super clusters.

3 cups old fashioned oats
1/4 cup pomegranate molasses
1/3 cup oil (I use olive oil because thats what I have on hand, but I am looking for coconut oil in the future)
1/3 cup honey
3/4 cup chopped dried fruit
1 1/4 cup nuts

Combine the wet ingredients.  Add the nuts and toss to coat.  Add the oats and stir to combine.  Spread on a cookie sheet and roast at 350 for about 15 minutes.  Stir and roast until everything is a golden color.  Remove from the oven and add the dried fruit.  If you add the dried fruit before roasting it will get tooth-breakingly hard in the oven and make you not want to eat the granola.

Cool the granola on parchment paper and store it in an airtight container to keep it crispy.  Serve with milk or over yogurt.

Monday, March 14, 2011

We Will Have A Guest Soon!

Its time to put the guest room back together since my Mom will be visiting at the beginning of April.  That gives us three weekends to get the room in a livable condition.

With help from J's Father, we got the guest bedroom and hall way primed.  It replaced the poopy walls with something a lot less poopy but unfinished nonetheless.  In addition, the guest room turned into the dumping ground for all our extraneous crap.  Everything we didnt know what to do with ended up sitting on the bed or desk.  It dosnt help that this is the room we used for our painting projects either.  All the hardware and home repair supplies ended up in this room too since we dont have very many places for storage in this house. And, while we covered the comforter up with plastic to keep the majority of construction debris away from the fabric, the dust from sanding both the kitchen cabinets and the walls has permeated the room.  Needless to say, it needs a couple coats of paint and a good cleaning!

Thats the easy part.  I have filled the gaps in the window frame with spackle and sanded those parts down, but the trim still needs a coat or two of glossy white paint.  We have picked a beautiful grey paint by Behr called Porpoise that is rich looking but not too dark and the white trim will really make it pop.  The grey we chose matches the grey in the curtain fabric perfectly. 
I have also started work on the headboard.  I want to paint it glossy white and decoupage the recessed portion with the left over fabric from the curtain.  I am not certain if this will make it too cheesy/crafty or if it will look fabulous...I am hoping for the latter. 

There is the issue of the side table to contend with as well.  The one I bought off of CL doesnt seem like its suitable for the space.  After about an hour of sanding, I just dont really want anything else to do with it for the time being and am on the search for a cheaper and more DIY friendly alternative.  I picked out the prettiest yellow paint at Home Depot yesterday and am just itching to paint something with it.  Its Behr high gloss in Citrus Zest and matches both the yellow in the curtain and the yellow sheets my Mom sent us a while back. 

I cant wait to get the room put together.  In reality, the guest room is the nicest room in the house.  It gets the best light and is set a bit further off the street than the master bedroom so its a bit quieter as well.  It has windows on two sides so it stays bright throughout the day and is large enough for both a sleeping area and a desk space.  The grey and yellow is a color palate that I picked after a trip to New Orleans and I think that it makes the space into a living memory of a great weekend and will make the already great room truly special. 

The remaining to-do list is as follows:
  • Paint the walls - Porpoise Grey
  • Paint the trim - Utlra Pure White
  • Rid the room of dust
  • Paint the headboard
  • Attach headboard to the bed
  • Find a suitable night stand and paint it - High Gloss Citrus Zest
  • Hang picture
  • Wash comforter and put yellow sheets on bed
  • Hang curtain
  • Address the issue of the guest bathroom, but thats a whole other post!

Saturday, March 12, 2011

Small Kitchen Improvements

Its been a bit quiet over here and thats mainly due to lack of funds.  We have still be busy with finishing up some more minor details that actually make a huge impact in the kitchen.

BEFORE


First, I spent a Sunday filling in most of the gaps in the kitchen cabinets with spackle, sanded it, and touched it up with paint.  When the cabinets were black, it hid some of the spacing issues that come with an old kitchen and painting everything a lighter grey shade made these little imperfections fairly obvious (at least to J and I).  Filling in the holes was one of those projects that probably never would have been completed if we had money to move on to the next room.  The space looks much more "finished" with that detail taken care of and we couldnt be happier with the results (unless we had a whole new kitchen). 

Second, I finally took the time to paint the inside of our open cabinet.  By painting the back of the cabinet the same color as the wall and the inside walls of the cabinet the same grey, it really brightens up the space.  No longer is there a black hole on the wall where seemingly no light can enter.  The new paint job also shows off our everyday plates, serveware, and glass storage containers very well. 

Third, and lastly, we had a new faucet installed.  The prior faucet was old and busted - literally.  The sprayer nozzle leaked and had to be pulled out and laid in the sink to keep the water from rushing into the cabinet space below.  Every time we turned the water on the entire system would make a terrible "whoomp, whoomp, whoomp" sound from the air escaping into the pipes.  The faster the water, the more quickly it would "whoomp."  It wasnt good.  In addition,the shallow depth of the sink was accentuated by the low arc of the faucet itself.  The configuration actually prevented us from filling pots with water for pasta.  We had to use a fancy tilt method that was precarious and extremely inconvenient in order to fill the taller of our pots.  We ended up choosing a faucet with a high arc and a sprayer nozzle built in to the head of the faucet.  This left a spare hole in the sink that we will eventually fill with a soap dispenser so we dont have to keep the palm olive out on the sink's ledge.


These seemingly small changes made a huge difference in our happiness with the space.  No longer do we focus on the blemishes in our cabinets and we can utilize the space in a much more comfortable way.  Of course, there is still an extensive wishlist for the kitchen, but our current set up isnt half bad.

AFTER

Thursday, March 3, 2011

Internet Marketing Genious


I think its google's fault.  Recently I have been shopping for things for the house online - imagine that!  I
almost never find what I am looking for but most of the time I am just shopping for ideas rather than tangible items.  Evidently the powers that be at google have been taking notice of my window shopping tendencies and have placed appropriate ads in the google reader screen at the bottom of each feed. 

Schaub & Company 237 Italian Designs Group Mosaic Cabinet KnobBefore now, the ads have not even warranted a second glace - that is until I saw this little gem.  Is it not the most fabulous drawer pull you have ever laid eyes on?!  Its angular and sparkly without being over the top.  Its a bit edgy and completely unique.  How did google know that this would be the handle I would love above all others? 

Seriously though, there are four drawers with absolutely no pulls in the guest bathroom and a cabinet that you have to pry open with your finger nails.  These are a perfect solution.  They work especially well given that I am looking to make a shower curtain for the bathroom with this striped Waverly fabric that matches the curtain in the guest bedroom.  The stripes in the curtain will be mimicked in the handles!  The handles are a bit pricey but its not preventative.  At $9 a pop thats only $36 for new drawer pulls and $12 for the larger handle for the cabinet. 

I am still working on what to paint the cabinets with in the bathroom.  The walls will eventually be grey Porpoise by Behr but the floor is tile has both tan and grey swirls in it.  The grout is a tan color (and probably needs to be redone) and the counter top is in decent shape and is a solid white-ish color.  I am thinking of using the Rustoleum Cabinet Transformation kit as seen here: http://cabinets.rustoleumtransformations.com/

I think the Pure White color with the glaze would add a bit of interest to the natural oak cabinets without clashing with the counter top, floor, or wall color and also will not be too matchy matchy.  I still have to swing by Home Depot for a sample or two to make sure thats the color I want, but the kit is supposed to be easy to use, damned near impossible to screw up, and its blogger approved!  Its also Rustoleum brand so you know the product is going to be durable.

We did end up priming both bedrooms and the hall way last weekend with help of the FIL so stay tuned for before and aftter pics in the near future.

Wednesday, February 9, 2011

Another Reveal

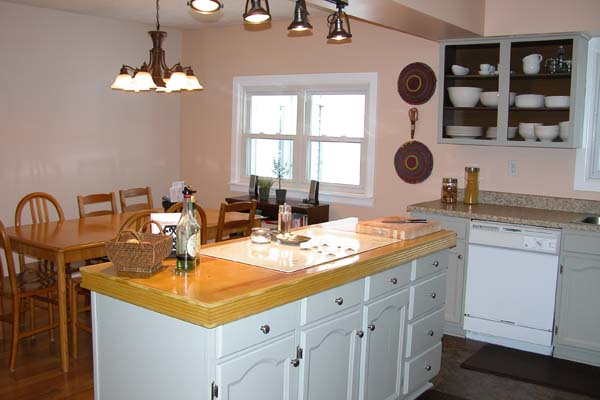
I have been talking a lot about our new kitchen and how wonderful the transformation turned out.  I have been beaming about how bright and airy it appears and how much happier it makes me.  I have been talking about the new buffet and the great plans I have for a dining room table. Well, here it is...the "new" kitchen.

It went from this:


To this:


And all in just a few weeks time.

Here are a few more pictures that will hit it on home. 

We are planning to paint the inside of the open cabinet for a more polished look

There will soon be curtains on the window, but doesnt the white frame look gorgeous!

This is a view from the living room into the kitchen.  We selected colors that transition well between rooms.
We are just SO thrilled with the results.  The cabinets are still old and busted but they are much more tolerable and the new color scheme makes even being in the room more pleasant.  I am less grumpy when cooking and everything cleans up so much easier now that it has a semi-gloss finish.

I think my Dad is planning on coming to visit at the end of April and one of the projects he may choose to help us with is changing out the light fixtures for something that matches the new decor.  Not only do I not really know what type of light fixture I want in the new space, but I have no idea how to change a fixture anyways so I am waiting for the expert.

While the clutter and disarray in the kitchen left me wanting to tear my hair out, the kitties loved the little nooks and crannies and drawers.  They loved discovering new areas to hide and all the new places they could squeeze their tiny bodies in to.

Vomer particularly loved to wait in the space left vacant by the drawer below the cutting board.  I think she was hoping I would drop a fresh piece of shrimp by accident the entire time.


Boo, on the other hand, liked to curl up in the drawer with the spare kitchen towels.  This of course meant that they all had to be rewashed before reassembling the kitchen. 


The things we put up with for the love of our pets!

Friday, January 28, 2011

Let There Be Dust!

I sanded everything but the cabinet fronts last night!  It made such a dusty mess that I am determined to take the cabinet doors outside to sand even though temperatures are supposed to below freezing this weekend.  At least taking them outside will minimize the damage to our nose and lungs and our kitties that have to live in the disaster zone.

Hoping to urge the process along, I sanded them after I got home last night thinking that we would HAVE to paint this weekend - being past the point of no return - and, knowing me, the project would be completed by Sunday. 

The prior owners did some half-ass work evidently because when I sanded some areas the paint just started to peel off.  In other areas you can see the wood finish through the paint even though I just did a very light sanding job to rough up the surface. 

Regardless of their errors and misjudgements, our cabinets will be glistening and beautiful by weekend's end!

Thursday, January 20, 2011

The Kitchen Project

The hubby and I are beginning the kitchen project this weekend.  We are doing a budget revamp of the space by painting the baby-poop brown walls and bringing some sophistication to the area with a new shade on the cabinets as well. 


Our dining room and kitchen are open to eachother and the living room is open to the dining room so our colors have to be somewhat cohesive.  We are using the same Behr Clamshell color on two of the walls and Behr Cinnamon Cake on the other two walls.  Our trim will be Ultra Pure White like the rest of the house and the cabinets are going to be a chic grey with Behr's Granite Boulder shade. 

The room will look instantly upated since the country style dark varnished window frames will be coated with the semi-gloss white.  Also, we are planning on taking off the cabinet doors to the section of storage that houses our white plates and dishes.  Since they are white and always neatly stacked, I thought it might add some charm and create more of an open feel - plus it will just be a nice change. 

All that means that tomorrow we will be sanding, de-hinging, and priming the area.  Saturday and Sunday will be spent hand painting the cabinets which may be a job reserved for me if J cant keep from making the paint drip.


Anyways, enjoy the before pictures since this will look vastly differnt in just 72 hours!

Tuesday, January 18, 2011

And...The Reveal!

I finally got my act together and took some pictures of the redone living room.  J and I worked extra hard last weekend putting out all our display items and finding appropriate places for most of them.  We also unpacked the last of our boxes as well so we should have everything out now.

We ended up dividing the room into two spaces, one for reading and working and one for watching tv.  In reality we would have liked to have less seating around the tv and have the conversational area be around the fireplace,  but right now we just dont have the furniture for that.


There are a few changes we will be making to this room.
First, yes, I did buy a lamp shade for the lamp on the round table.  It broke during the move and I hadnt gotten around to Target for one yet.


Second, the cable wires to the tv will be relocated at some point.  We are hoping to have the cable outlet somewhere in the vicinity of the tv  in both the living room and the bedroom so we dont have OSHA trip hazards across our floors - for now though, it works.

Third, we are looking for a large square or long rectangular coffee table.  Even if we end up switching out the cream sofa for a love seat or two chairs, the oval coffee table we have now just aint cuttin it.  The glass top is also pretty scratched up from multiple moves and grad student life.


Fourth, we would like a long and low storage unit for the tv.  It would be great if the unit would be at eye level and I am thinking of something slightly retro or scandinavian in design with sliding doors and invisible seams.  We'll see what craigslist has to offer, but for now they are coming up a bit short!

Fifth, I just bought fabric to make curtains for the window behind the cream couch.  We chose a beautiful Moroccan inspired pattern with oranges, browns, and greens that will help to add a little life to that large empty wall.  I found even found a curtain rod at bed bath and beyond on clearance for $11 that should work for the space.
 

Sixth, we desperately need rugs.  We would like one large one under the sofas and coffee table and a smaller one in front of the fire place.  I think they would help to define the space better and would give the kitties someplace soft and fuzzy to sleep. 

My favorite part of the room is how much brighter it is.  The wall color is warm and inviting without being south western.  By dividing the room up, we get to use all our existing furniture and create a comfortable space in a room that could have otherwise been too large.

Wednesday, January 12, 2011

In progress...
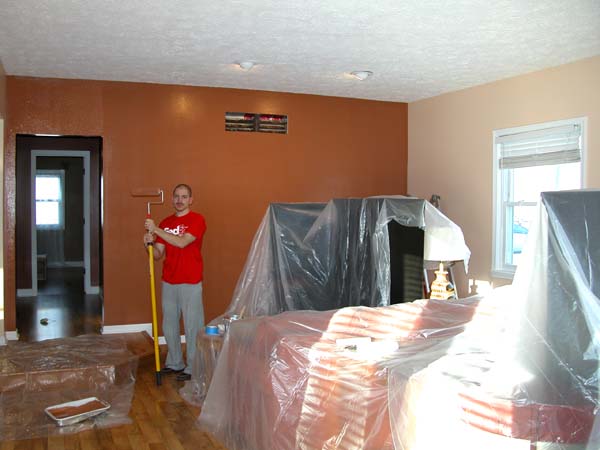
J and I have decided to organize our books differently (by color rather than by category) and so getting the room together is taking a bit longer than I had anticipated.  If I had been left to my own devices, the entire house would be painted by now and everything would be in its place.  I probably wold have killed myself getting it done, but it would have been done.  Now J is having us take our time which, I have to admit, is probably better than murdering myself over it all.

Anyways, to prove that we actually did paint the living room this last weekend, here are some action shots.

First we primed...always exciting!
 

We were good and pushed what furniture we couldnt relocate into the middle of the room and covered it in plastic sheeting.  This worked fine since we werent repainting the ceiling (yet) and we mainly just didnt want kittie paws on our furniture if they happened to get friendly with the paint roller.

We picked Behr paint from Home Depot.  We had used it in the past with great results and found that it covered much better than more expensive Porter paints that Jonathan's parents had used recently for the bedroom remodel.  The colors we chose were Earth Tone for the accent wall and Clamshell for the main part of the room.  We wanted something light to counter act the darkness of the room.  There isnt a ton of lighting in there at night and we didnt want it to feel like a cave.


So even though J is the only one in the photos, I really did put in my share of the effort.  He is undoubtedly better at rolling on the paint than I am, but I am better at edging and painting the trim so we make a good team.

We were presantly surprised by how well the Clamshell paint coordinated with the stone fireplace.  We arent a big fan of the stones or the MASSIVE rustic mantle, but the paint color really softens the feature and will make it much more livable until we can do something about it.


Monday, January 10, 2011

BEFORE - Living Room

Friday we primed - everything.
Saturday we painted all the walls.
Sunday I added semigloss to all the trim and doors of the living room.

No longer does it look like this.

It helps that the furniture of the sellers is gone.

It helps that all the country stars have been removed from sight (except for in the guest bathroom).

It helps that its no longer the season for christmas decor.

But mainly its just clean, and neat, and ours.

Photos of the AFTER to come.